scripting a Raspberry Pi to boot and shoot timelapse photos
What I want to do
I wanted to setup my Raspberry Pi to automatically boot and start shooting photos, so I could use it for aerial photography. I’d previously modded a pi camera to pull out the infrared filter, but the Raspberry Pi foundation had sent me a pre-production model of the NoIR Pi cam. I took photos with the #74 filter and it worked great.
As this process was the first stage in making a stripped-down camera version of the raspberry pi, i didn’t want it to load processor/memory/battery intensive processes; I wanted to auto-boot into command line mode. I got it all working, below are some instructions.
This was a five-step process: 1) make a timelapse script, 2) make the script boot on login, and 3) set the Pi to automatically login on boot, 4) put it in a box with a battery, 5) go flying.
My attempt and results
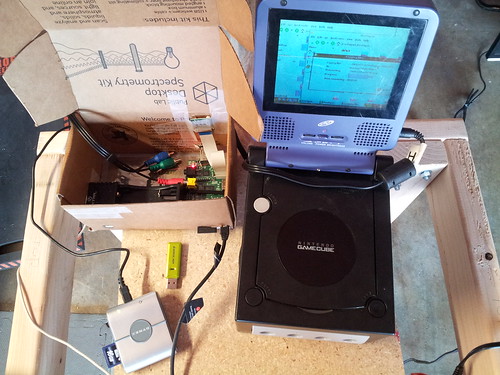
Here’s my pi in a box with battery pack, using an old stand-alone gamecube monitor:
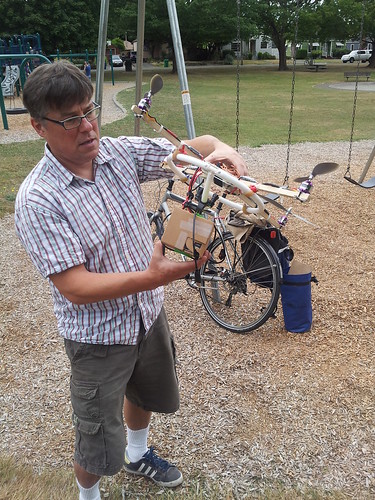
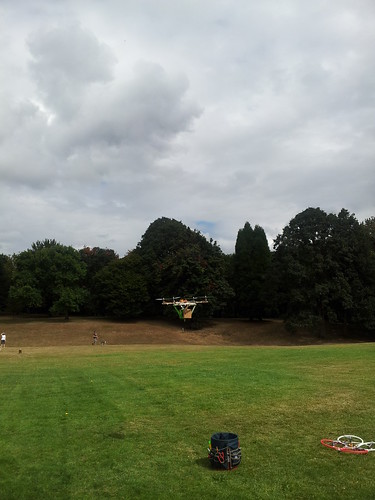
I got everything to work and went flying with Rich Burton and his HooperFly quadcopter. It couldn’t go as high as I really wanted to go, but it was very steady, quick, and returned great photos.
Precautions:
in case I screwed up I made another user:
sudo useradd {USERNAME}
sudo passwd {USERNAME}
If anything went wrong, I used the command CTRL-ALT-F2 to start a new terminal and login as a different user and edit any of my scripts from a different session. This happened a bunch before i got the settings right.
Timelapse
I started by writing and checking a timelapse script. I copied the work done by Andrew Back at Design Spark. I changed around the directory and made the script shoot PNGs instead of JPGs to lower the image compression.
I created a script in the /etc/init.d directory, because this is where background processes are kept:
sudo nano ~/etc/init.d/timelapse.ch
This is the script:
## !/bin/bash
## for automatically taking timelapse photos

ROLL=$(cat /home/pi/Desktop/images)

SAVEDIR=/home/pi/Desktop/images/timelapse

while [ true ]; do

filename=$ROLL-$(date -u + "%d%m%Y_%H%M-%S").png

raspistill -o $SAVEDIR/$filename

## sleep for 10 ten seconds

sleep 10;

done;
You will have to change the permissions to make it executable:
sudo chmod ugo+x/etc/init.d/timelapse.sh
you can test the script then by typing:
bash timelapse.sh
Boot and Autorun
I then needed setup the pi to auto-login on boot, and load the script.
I setup an autologin starting with info from AK Eric who summarized and condensed this thread on the Raspberry Pi forums. The suggested line to add to inittab clearly wasn’t right. I found a different set of instructions on Stackexchange, and a discussion thread on the issue on the Raspberry Pi Forums. After fixing the issue using the info from Stackexchange, I shared back to the Forum issue.
go to inittab:
sudo nano ~/etc/inittab
find the line:
1:2345:respawn:/sbin/getty --noclear 38400 ttyl
comment it out (#) and below add the line :
1:2345:respawn:sbin/getty --autologin {USERNAME} --noclear 38400 tty1
save and close (CTRL X)
go to:
sudo nano ~/.bashrc
go to the last line and add:
echo .bashrc : Running /etc/init.d/timelapse.sh
bash etc/init.d/timelapse.sh
Questions and next steps
I’d wanted to shoot RAW, but RAW shooting is pretty new and looked like more work than I was up for. Here’s the discussion on the ‘Pi forums and the RAW code on github
I also wanted to be able to SSH into my Pi so I could modify it while “headless” (no screen/keyboard) in the field. I didn’t quite get that setup.
I also looked at changing the directory to load onto an external SD card, but had difficulty consistently recognizing and saving to it. I had trouble writing to Fat32 memory cards, so ended up formatting a card using ext4, a linux file system. The problem with using ext4 is that the permissions have to be changed to allow each user on each system access. Its not a good camera-memory card format, and required plugging the card into my other linux box to read. I’d like to figure out how to use standard FAT32 cards… But here’s how to format an SD card for ext4:
dmesg | tail
found it as sdd:sdd1, unmounted it:
sudo umount /dev/sdd
then formatted it:
sudo mkfs.ext4 'pisd' /dev/sdd
Archived 4th of March 2018 from Publiclab.org.